Changing your car’s oil is one of the most essential and straightforward maintenance tasks that every car owner should know. Not only does it keep your engine running smoothly, but it also saves you money compared to taking your car to a mechanic. For beginners, the idea of performing an oil change can seem intimidating, but with the right tools and a clear set of instructions, it’s a task that can be easily mastered. This guide provides step-by-step instructions and helpful tips to ensure your first DIY oil change is a success, giving you the confidence to take on more automotive maintenance tasks in the future.
Gathering the Necessary Tools and Supplies
What You’ll Need for the Job
Before you begin your oil change, it’s important to gather all the necessary tools and supplies. You’ll need a wrench or socket set to remove the oil drain plug, an oil filter wrench to remove the old filter, a drain pan to catch the old oil, and a funnel to pour in the new oil. Additionally, you’ll need a new oil filter, the correct type and amount of oil for your vehicle, and a pair of gloves to keep your hands clean. It’s also a good idea to have some rags or paper towels on hand to clean up any spills. Many automotive stores and websites like AutoZone and Advance Auto Parts offer oil change kits that include most of these items, making it easier to get started.
Choosing the Right Oil and Filter
Selecting the correct oil and filter for your vehicle is crucial for ensuring optimal performance. Your vehicle’s owner’s manual will specify the type and viscosity of oil that’s recommended, such as 5W-30 or 10W-40. The manual will also provide information on the appropriate oil filter to use. If you’re unsure, you can consult with a store associate at your local automotive shop or use online resources like Mobil or Castrol to find the right products for your car. Using the correct oil and filter not only prolongs the life of your engine but also ensures that your vehicle runs efficiently.
Preparing Your Vehicle
Warming Up the Engine
Before you drain the old oil, it’s important to warm up the engine. Running the engine for about five to ten minutes helps to thin the oil, making it easier to drain completely. However, be cautious not to let the engine get too hot, as this can make the oil dangerously hot to handle. Once the engine is warm, turn it off and ensure the car is on a level surface. Engaging the parking brake is also a good safety measure to prevent the car from rolling while you work. If you’re using ramps or a jack to lift the car, make sure it’s securely positioned and that you use jack stands for added safety. Websites like YourMechanic provide additional safety tips and detailed guides on preparing your vehicle for an oil change.
Draining the Old Oil
Once your car is safely positioned, it’s time to drain the old oil. Place the drain pan under the oil drain plug, which is typically located at the bottom of the engine. Using your wrench, carefully loosen the plug and allow the oil to drain completely into the pan. This process can take several minutes, so be patient and ensure all the oil has drained out. While the oil is draining, you can prepare to remove the oil filter. Keep in mind that the filter may contain some oil, so have your drain pan ready to catch any spills. For a more in-depth look at the oil draining process, websites like The Drive offer step-by-step articles and videos.
Installing the New Filter and Adding Fresh Oil
Replacing the Oil Filter
After the old oil has drained, it’s time to replace the oil filter. Using your oil filter wrench, carefully unscrew the old filter and set it aside. Before installing the new filter, it’s recommended to apply a small amount of fresh oil to the rubber gasket on the top of the filter. This helps create a secure seal and makes it easier to remove during your next oil change. Screw the new filter in place by hand, tightening it until it’s snug but not overly tight, as this can damage the gasket. Make sure the old oil filter’s gasket isn’t stuck to the engine, as this could cause leaks when you install the new filter. For more tips on replacing oil filters, Pep Boys provides expert advice and videos.
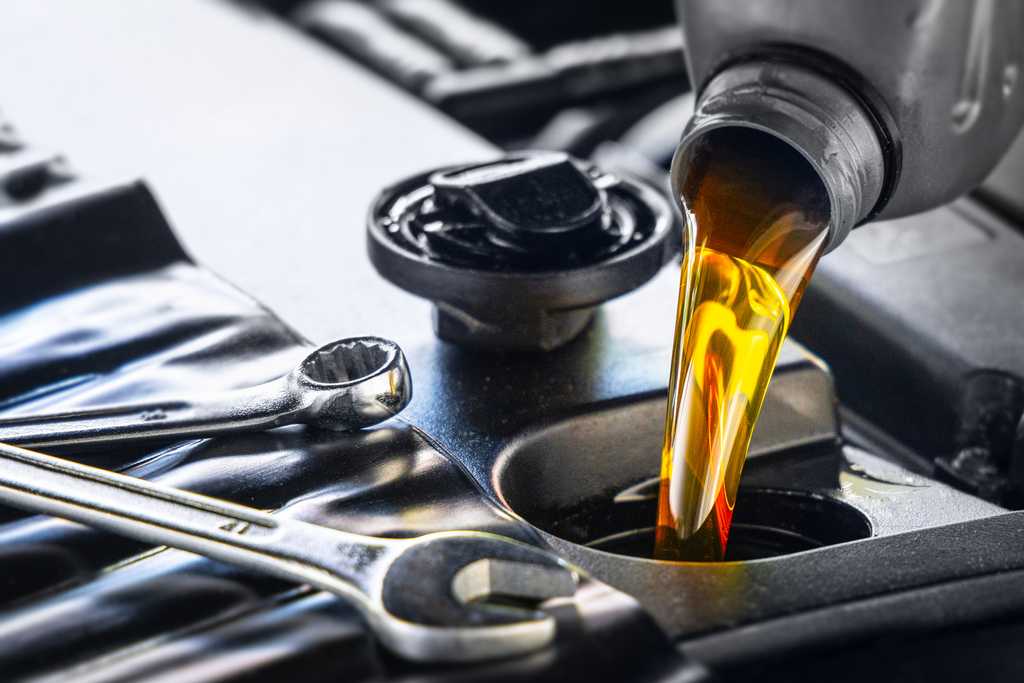
Adding the New Oil
With the new filter installed, it’s time to add fresh oil to your engine. First, replace the oil drain plug and tighten it securely. Then, remove the oil fill cap on top of the engine and use a funnel to pour in the new oil. Pour slowly to prevent spills, and check your owner’s manual to ensure you add the correct amount of oil. Once you’ve added the oil, replace the fill cap and start the engine. Let it run for a minute or two to circulate the new oil, then turn it off and check the oil level using the dipstick. If necessary, add more oil until the dipstick shows that the oil level is full. For detailed instructions on how to check and top off your oil, Car and Driver offers helpful guides.
Final Steps and Cleanup
Disposing of the Old Oil
Properly disposing of your old oil is an important part of the oil change process. Used motor oil is hazardous and should never be poured down the drain or thrown in the trash. Most auto parts stores, service stations, and recycling centers accept used oil for recycling at no charge. Pour the old oil into a sealed container, such as the empty bottle from your new oil, and take it to the designated recycling facility. Additionally, be sure to recycle the old oil filter if possible. Websites like Earth911 provide information on local recycling facilities and how to dispose of automotive fluids responsibly.
Record Keeping and Maintenance
Keeping track of your oil changes is essential for maintaining your vehicle’s health. Write down the date, mileage, and type of oil used so you can reference it later. This information is helpful for scheduling your next oil change and ensuring that your car remains in good condition. Regular oil changes are key to prolonging the life of your engine and preventing costly repairs down the line. Websites like Edmunds offer tools for tracking your vehicle’s maintenance history and reminders for upcoming service intervals.
Conclusion
Performing a DIY oil change is a rewarding experience that not only saves you money but also gives you a greater sense of ownership over your vehicle’s maintenance. By following these step-by-step instructions and using the right tools and techniques, you can confidently complete an oil change in your own garage. Remember, the key to a successful oil change is preparation, attention to detail, and proper disposal of the old oil. As you gain experience, you’ll find that this task becomes quicker and easier, and you’ll be well on your way to mastering other basic car maintenance tasks. With the right knowledge and a little practice, you can keep your engine running smoothly and ensure your car stays in top condition for years to come.